Category: Uncategorized

  • How to Create Solar Independence at Home

    How to Create Solar Independence at Home

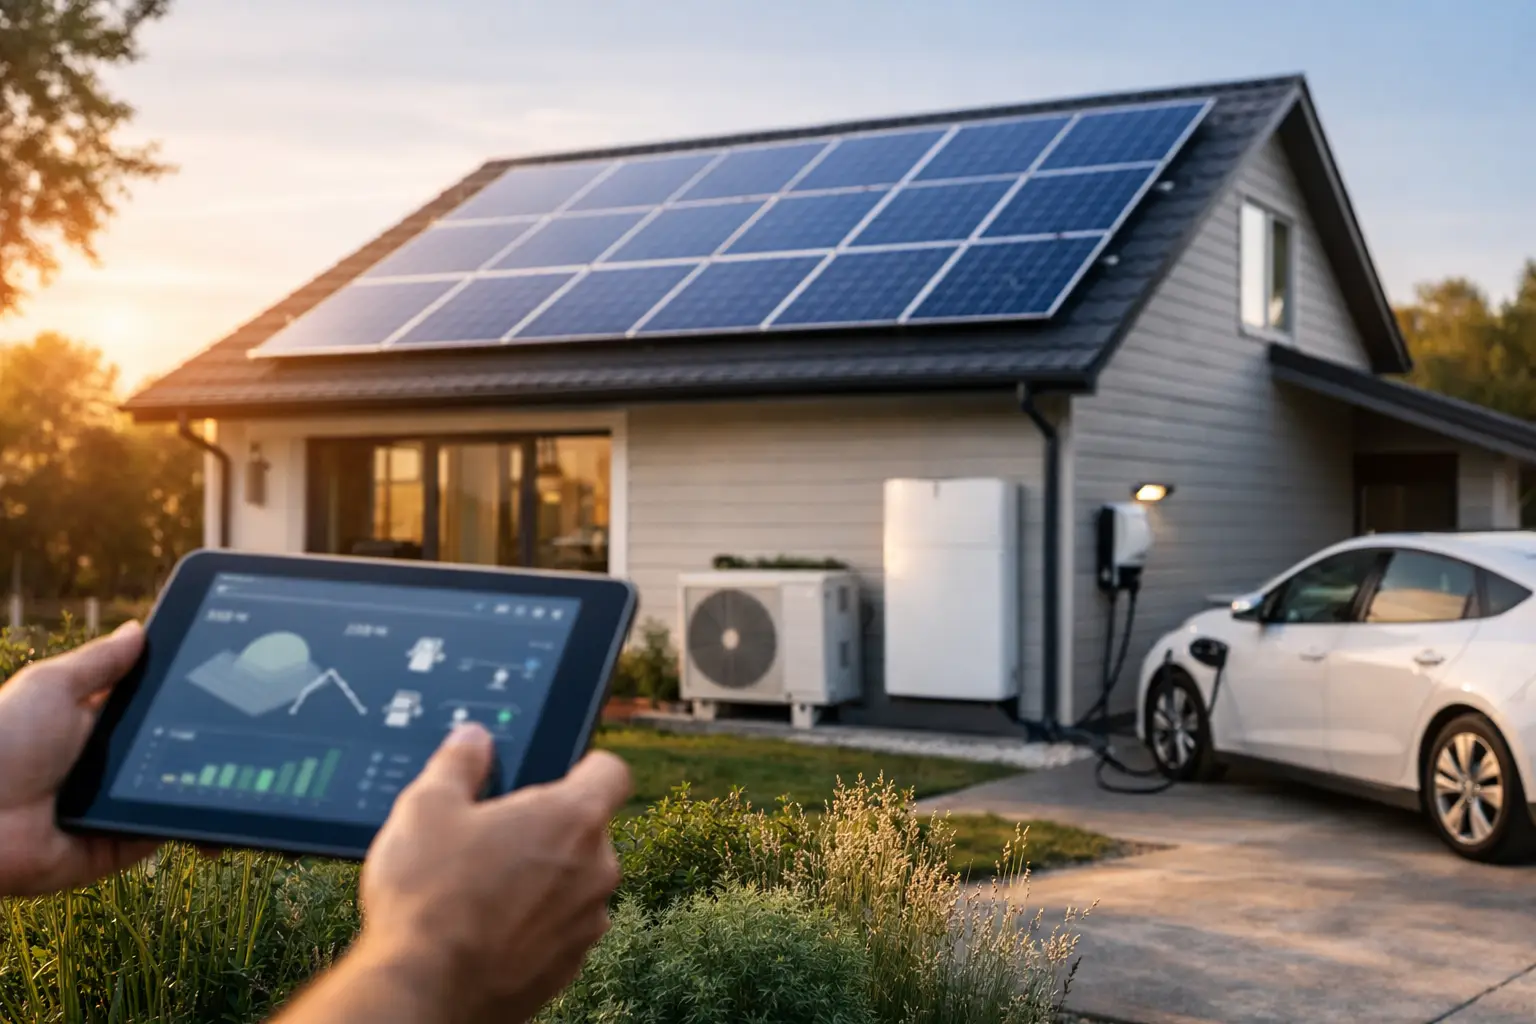
    A solar panel on the roof is a promising start, but it does not automatically make a home independent. Learning how to create solar independence means designing your power around the life you actually want to live: quiet cabin mornings, a tiny home that works without hookups, or a house that stays comfortable when the grid goes down.

    The goal is not necessarily to produce every watt yourself on every day of the year. For many people, solar independence is the ability to control more of their energy, rely less on utility power, and keep essential comforts running when outside systems are unreliable. It is a practical form of freedom, built one deliberate decision at a time.

    Define what independence means for your space

    Start by choosing the level of independence you want. A grid-tied solar system lowers your utility bill but usually shuts off during an outage for safety. A solar-plus-battery system can keep selected loads running when the grid is unavailable. A fully off-grid system supplies all of your electricity without a utility connection, which requires more generation, more storage, and more discipline around energy use.

    There is no single right answer. A weekend cabin may only need lighting, device charging, a water pump, and a compact refrigerator. A full-time tiny home may need those basics plus cooking, heating support, internet, and a workspace. A primary residence may prioritize a backup for refrigeration, medical equipment, well pumps, and a few rooms rather than every appliance in the house.

    Be specific about the moments you want your system to protect. If a storm knocks out power for three days, what must remain on? If you are building a retreat to unplug, what can be left out entirely? Clear answers prevent the common mistake of buying more equipment than you need or, just as frustrating, building a system that cannot support your real routines.

    How to create solar independence by measuring demand

    Solar design begins with consumption, not panels. Look at your utility bills for the past 12 months if you have them, especially your highest-use months. For a cabin, van, or new tiny home, make a simple inventory of every device you expect to use, its wattage, and how many hours it runs each day.

    A 60-watt laptop used for six hours consumes roughly 360 watt-hours. A 1,200-watt coffee maker used for 10 minutes consumes about 200 watt-hours. The bigger challenge is often not small electronics but heat-producing appliances: electric resistance heaters, dryers, ovens, air conditioners, and standard electric water heaters can drain a modest battery bank quickly.

    Think in two measurements. Daily energy use, measured in kilowatt-hours, tells you how much solar generation and battery capacity you need. Peak power, measured in watts, tells you how large your inverter must be. A system might have enough stored energy for a full day yet still struggle to start a well pump, run a microwave, or handle several high-draw appliances at once if the inverter is too small.

    This is where intentional living pays off. You do not need to sacrifice comfort to reduce demand. You can choose efficient appliances, use propane or induction strategically for cooking, heat water with a heat-pump unit, and shift demanding tasks to sunny hours. The best solar system is often the one paired with a thoughtfully designed home.

    Size panels for your least forgiving season

    Solar panels produce differently throughout the year. Summer output can make a system feel abundant, while short winter days, snow cover, shade, and cloudy weather reveal its limits. Design around the period when sunshine is least dependable, not the bright July day when every panel is performing at its best.

    Your location, roof angle, tree cover, and panel orientation all matter. South-facing panels are often ideal in the Northern Hemisphere, but east-west arrays can make sense when you want broader production across the morning and afternoon. Ground mounts offer easier access and more control over orientation, though they require open space and may need protection from pets, wildlife, and weather.

    A qualified solar professional can model local solar production and account for roof conditions, permitting requirements, and electrical code. That guidance is particularly valuable for grid-connected systems, battery installations, and any setup with a generator, transfer switch, or critical-load panel. Independence should feel empowering, not improvised.

    Build storage around the outages you expect

    Panels make electricity when the sun is available. Batteries make solar useful after sunset and during an outage. Their job is not only to store excess energy but to give your household a calmer response to changing weather and grid instability.

    Battery capacity is usually described in kilowatt-hours. What matters is usable capacity, since battery systems retain a small reserve to protect their lifespan. If your essential loads consume 5 kilowatt-hours per day and you want two days of backup, you will need substantially more than 10 kilowatt-hours once you allow for conversion losses, changing temperatures, and a margin for real life.

    Autonomy is a trade-off. More battery capacity extends your runway, but it raises the cost of the system. For a primary home, it can be more sensible to back up a dedicated set of essential circuits than to power the entire house. For a remote cabin, a generator may be a practical secondary layer for long stretches of poor weather. Using a generator occasionally does not erase the value of solar independence. It is part of building a resilient system instead of an idealized one.

    Reduce waste before adding more equipment

    Every watt you avoid using is a watt you do not need to generate, store, or pay for. Efficiency makes a solar setup smaller, quieter, and easier to live with.

    Start with the loads that run constantly. A high-efficiency refrigerator, LED lighting, insulated windows, smart power strips, and well-sealed doors make a meaningful difference over a full year. In small spaces, ventilation and insulation deserve special attention. A compact heat pump can be far more efficient than electric resistance heat, while a shaded window or awning can reduce summer cooling demand before it reaches the thermostat.

    Habits matter, too. Run laundry, dishwashing, tool charging, and water pumping when solar production is strong. Avoid stacking high-demand activities during low-light periods. These are not restrictive rules. They are simple ways of aligning daily life with your own power supply.

    Choose the right system path

    For many homes, a phased approach is the smartest one. Begin with an energy audit and efficiency upgrades. Add solar generation next, then battery storage when your budget and local incentives align. If you are building new, plan conduit routes, electrical-panel capacity, battery location, and roof orientation early. A few decisions made during construction can save significant cost later.

    Before committing, verify local permitting, HOA rules, utility interconnection policies, and net-metering terms. These policies vary by state and utility, and they can change the financial case for exporting excess solar power. Also ask installers exactly what happens during an outage. Not every solar system provides backup power, and not every battery supports the same loads.

    For cabins and compact off-grid setups, keep the system serviceable. Place components where you can inspect them, protect batteries from extreme temperatures when possible, label circuits clearly, and leave room for future expansion. Premium equipment is worth more when it remains easy to understand and maintain.

    Live with your system, then refine it

    The first year is a learning period. Track production, battery behavior, and the appliances that create unexpected demand. Notice how the system performs in rain, winter, and shoulder seasons. You may find that a small appliance change, an additional panel, or a revised backup-load plan delivers more value than a major upgrade.

    Solar independence is not a finish line marked by a perfect percentage of self-generation. It is the confidence of knowing where your power comes from, what your space needs, and how to make thoughtful choices when conditions change. At Off The Grid Store, that kind of confidence is the point: a home, cabin, or retreat that supports more time outside, fewer unnecessary dependencies, and a life that feels distinctly your own.

    Start with the loads that matter most, design for the days when sunlight is scarce, and let each improvement make your space a little more capable. The quiet payoff is not just lower reliance on the grid. It is the freedom to create a place that works on your terms.
  • Rainwater Collection for Tiny Homes Made Simple

    Rainwater Collection for Tiny Homes Made Simple

    A tiny home does not need a giant utility bill to feel comfortable. With a thoughtfully designed rainwater system, the water falling on your roof can support a quieter, more independent way of living – whether you are building a full-time off-grid home, outfitting a cabin, or making weekend escapes easier.

    Rainwater collection for tiny homes is not simply a matter of placing a barrel under a gutter. The right setup accounts for your local rainfall, roof material, water use, storage space, filtration needs, and local rules. Get those pieces right, and rain becomes a dependable part of a well-designed small-space lifestyle.

    Start With Your Water Reality

    Before choosing tanks, pumps, or filters, consider how you actually live. A couple using a tiny home on occasional weekends has very different water needs than a family living there year-round. Conservation matters, but comfort matters too. The goal is not to make every shower feel like a survival exercise. It is to make your system match your habits.

    For a simple baseline, many people estimate 20 to 50 gallons per person per day in a tiny home. The lower end is realistic when you use efficient fixtures, take shorter showers, run a compact washer sparingly, and treat water as a resource rather than an endless utility. Drinking, cooking, washing dishes, bathing, laundry, and toilet use all belong in the calculation.

    A composting toilet can significantly reduce demand, since conventional flushing often accounts for a surprising share of household water use. Low-flow showerheads, faucet aerators, and a dishpan for hand-washing dishes can also stretch stored water without making the home feel restrictive.

    It helps to separate your water into two categories from the start: potable water for drinking and food preparation, and utility water for uses such as toilet flushing, laundry, or outdoor cleaning. You may decide that collecting rainwater for non-potable use is the right first step. A potable system can offer greater independence, but it requires more rigorous treatment and maintenance.

    How Much Rain Can a Tiny Roof Catch?

    Small homes have small roofs, which is both the appeal and the constraint. Your catchment area is usually the footprint of the roof, not the total interior square footage. Roof pitch does not dramatically increase the collection calculation because rainfall is measured as it falls vertically.

    A practical formula is:

    Roof area in square feet × annual rainfall in inches × 0.623 = annual gallons collected

    Then reduce that result by roughly 10 to 20 percent to account for first-flush diversion, evaporation, overflow, and imperfect capture. For example, a 300-square-foot roof in an area with 30 inches of annual rainfall can collect about 5,600 gallons before those losses. That can be meaningful support for a conservation-minded tiny home, but it will not cover every household need in every climate.

    Rainfall timing matters as much as the annual total. A region with regular summer storms is easier to manage than one that receives most of its rain in a short winter season followed by months of dry weather. In dry or highly seasonal areas, a rainwater system often works best alongside a backup plan, such as hauled water, a legal well connection, or a nearby approved fill source.

    The Essential Parts of a Rainwater Collection System

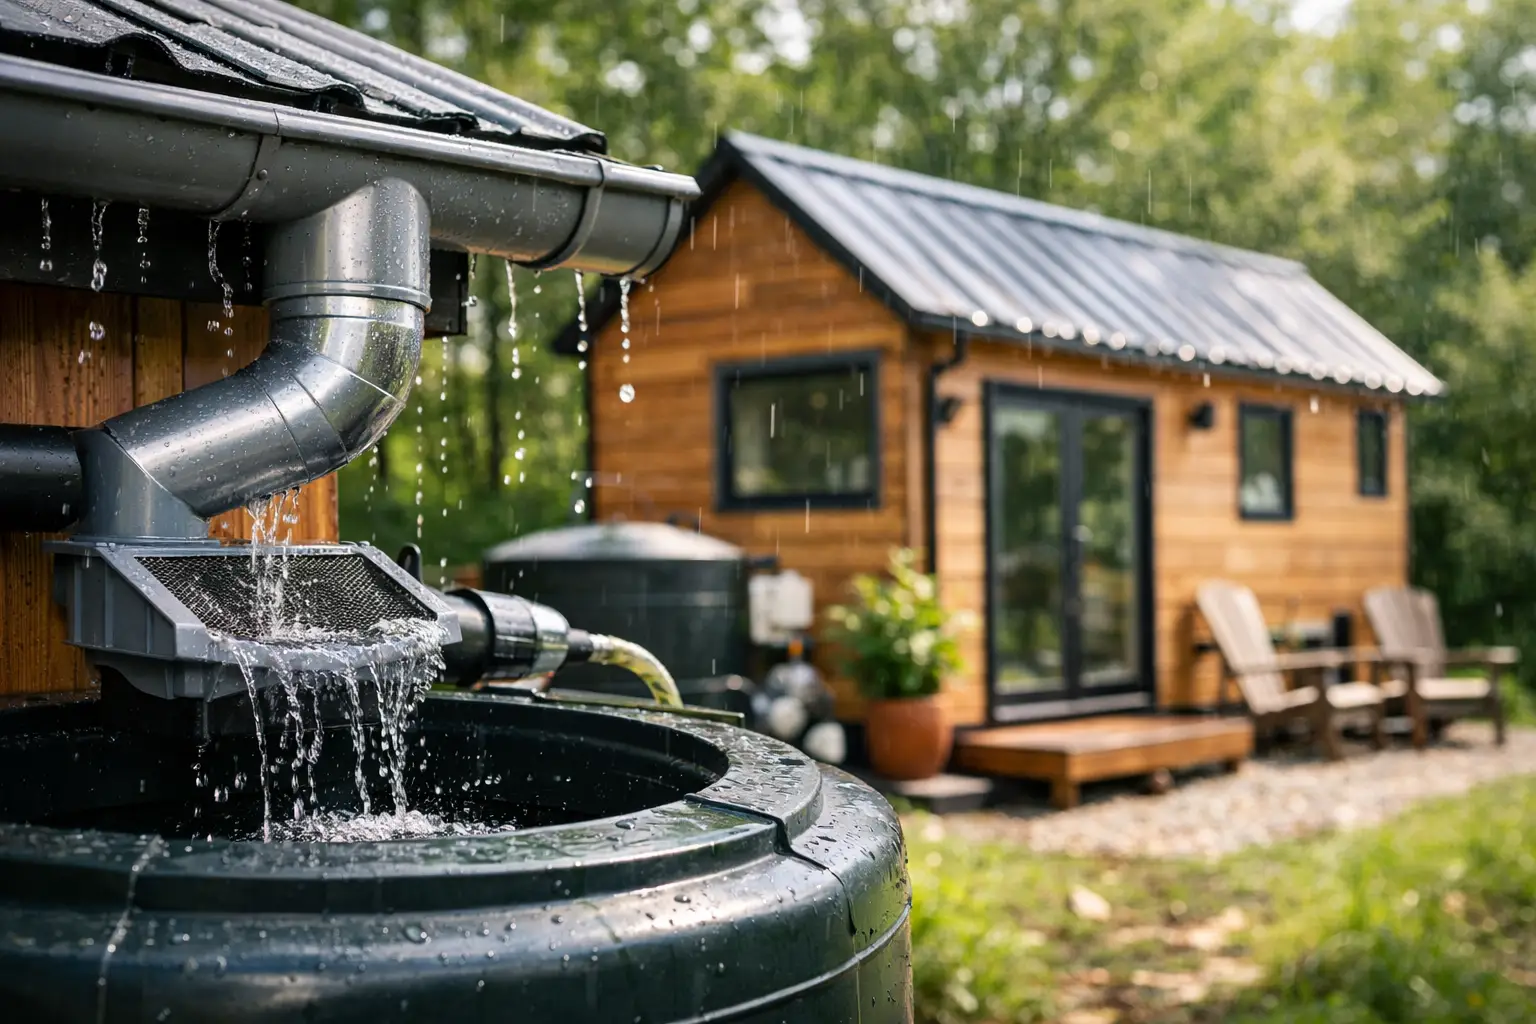
    The most reliable systems are simple in concept and deliberate in detail. Water lands on a clean roof, moves through gutters, passes debris screening and a first-flush diverter, enters a covered tank, and then travels through filtration and a pump before reaching a fixture.

    Your roof is the first surface in the system. Metal roofing is a popular choice for rainwater harvesting because it is smooth, durable, and easy to rinse clean. Some asphalt shingles can be used for non-potable collection, but they may shed grit and chemical residues, especially as they age. Avoid roofs with materials that can introduce harmful contaminants when you plan to drink the water.

    Gutters should be sized for local downpours, securely fastened, and kept clear. Leaf screens help, but they are not a substitute for occasional cleaning. A first-flush diverter is equally valuable. It sends the first portion of a rainfall event away from the tank, carrying dust, pollen, bird droppings, and other roof debris with it.

    Storage is where tiny-home planning becomes personal. A compact 55-gallon barrel may be useful for gardening or emergency water, but it will not carry a household through much dry weather. For more meaningful resilience, many tiny-home owners use one or more opaque polyethylene tanks ranging from 250 to 1,500 gallons. Slimline tanks fit along a wall. Low-profile tanks can work beneath a deck. Larger tanks may be placed beside the home, underneath an elevated structure, or partly buried where climate and local conditions allow.

    Choose opaque, food-grade storage with a tight-fitting lid, screened vents, an overflow outlet, and a drain or sediment cleanout. Sunlight encourages algae. Open access invites insects and debris. Small design decisions protect water quality before the filter ever has to work.

    Rainwater Collection for Tiny Homes: Filtration That Fits the Use

    If collected rainwater will only serve landscaping or basic utility needs, a sediment filter may be enough. If it will supply showers, sinks, and laundry, use staged filtration that catches progressively finer particles. For drinking water, treatment needs to address sediment, bacteria, viruses, and other possible contaminants.

    A common potable setup uses a washable sediment pre-filter, followed by finer filtration and a disinfection method such as UV treatment. Some systems also use activated carbon to improve taste and reduce certain chemicals. The exact combination depends on your source water, roof material, tank condition, and local health requirements.

    Do not assume that clear water is safe water. Rainwater can pick up contaminants from the roof, wildlife, airborne particles, and the plumbing itself. If you intend to drink it, test the water periodically through a qualified laboratory, particularly after installing the system, changing components, or experiencing severe weather. Follow local and state guidance for potable rainwater systems, as rules vary widely across the US.

    A pressure pump makes rainwater feel like regular plumbing, but it should be chosen for your actual fixtures and pipe runs. An oversized pump can be loud and wasteful in a compact home. A small variable-speed or demand pump paired with an accumulator tank often creates steadier pressure and fewer short cycling starts. Insulate exposed pipes and protect tanks, filters, and pumps from freezing temperatures if your tiny home sees winter weather.

    Design for Maintenance, Not Just Installation

    The best system is one you will actually care for. A tank tucked into an impossible crawl space may look clean in a floor plan, but it becomes frustrating when a filter needs changing or a valve needs repair. Leave room to inspect fittings, clean screens, drain sediment, and service the pump.

    A simple seasonal routine keeps the system dependable:

    • Check gutters, roof debris, screens, and overflow paths before the rainy season.
    • Empty and rinse the first-flush diverter as needed, especially after long dry spells.
    • Replace or clean filters according to their rated use and visible condition.
    • Inspect tank lids, vents, seals, and mosquito screens for damage.
    • Test potable water on a schedule that matches your use, local guidance, and any changes in water quality.

    Pay attention to overflow, too. A full tank should send excess water safely away from the home foundation, neighboring property, and any area that could become muddy or icy. A swale, rain garden, or properly routed drainage line can turn heavy rain into a landscape asset rather than a maintenance problem.

    Build Independence With a Backup Plan

    Rainwater can increase your freedom, but self-reliance is not the same as pretending weather is predictable. A well-planned tiny-home system includes an honest backup strategy for drought, frozen lines, extended travel, or a failed pump. Keeping a reserve of treated drinking water, carrying spare filters, and having a manual way to access stored water are practical forms of resilience.

    This is also where a hybrid setup can shine. Rainwater may handle washing, showers, and non-potable needs while a separate drinking-water supply provides peace of mind. Or a larger tank may be filled by rain whenever possible and topped up from an approved source during dry periods. There is no prize for making the system more complicated than your location requires.

    For a permanent installation, check county, city, HOA, and building-code requirements before buying equipment. Some places encourage rainwater harvesting. Others regulate tank placement, plumbing connections, backflow protection, or potable use. A little research early on prevents expensive changes later.

    A rainwater system is more than a utility feature. It is a daily reminder that a smaller home can still support a rich, capable life. Start with the rainfall you have, the comfort you want, and a system you can maintain with confidence. The result is not just stored water. It is more room to live on your own terms.

  • 12 Best Tiny House Storage Hacks That Feel Built-In

    12 Best Tiny House Storage Hacks That Feel Built-In

    A tiny home feels spacious when every item has a clear place to land. The best tiny house storage hacks are not about cramming more into every corner. They create an easier rhythm: less visual noise, fewer duplicate supplies, and a home that can support quiet mornings, road trips, remote work, and fully off-grid weekends without feeling crowded.

    The most effective systems begin with honest habits. Store what you use often where you can reach it without moving three other things. Keep seasonal and backup gear higher, lower, or deeper. Then choose storage that earns its footprint by doing more than one job.

    Best Tiny House Storage Hacks for Everyday Freedom

    1. Build storage into the places you already sit

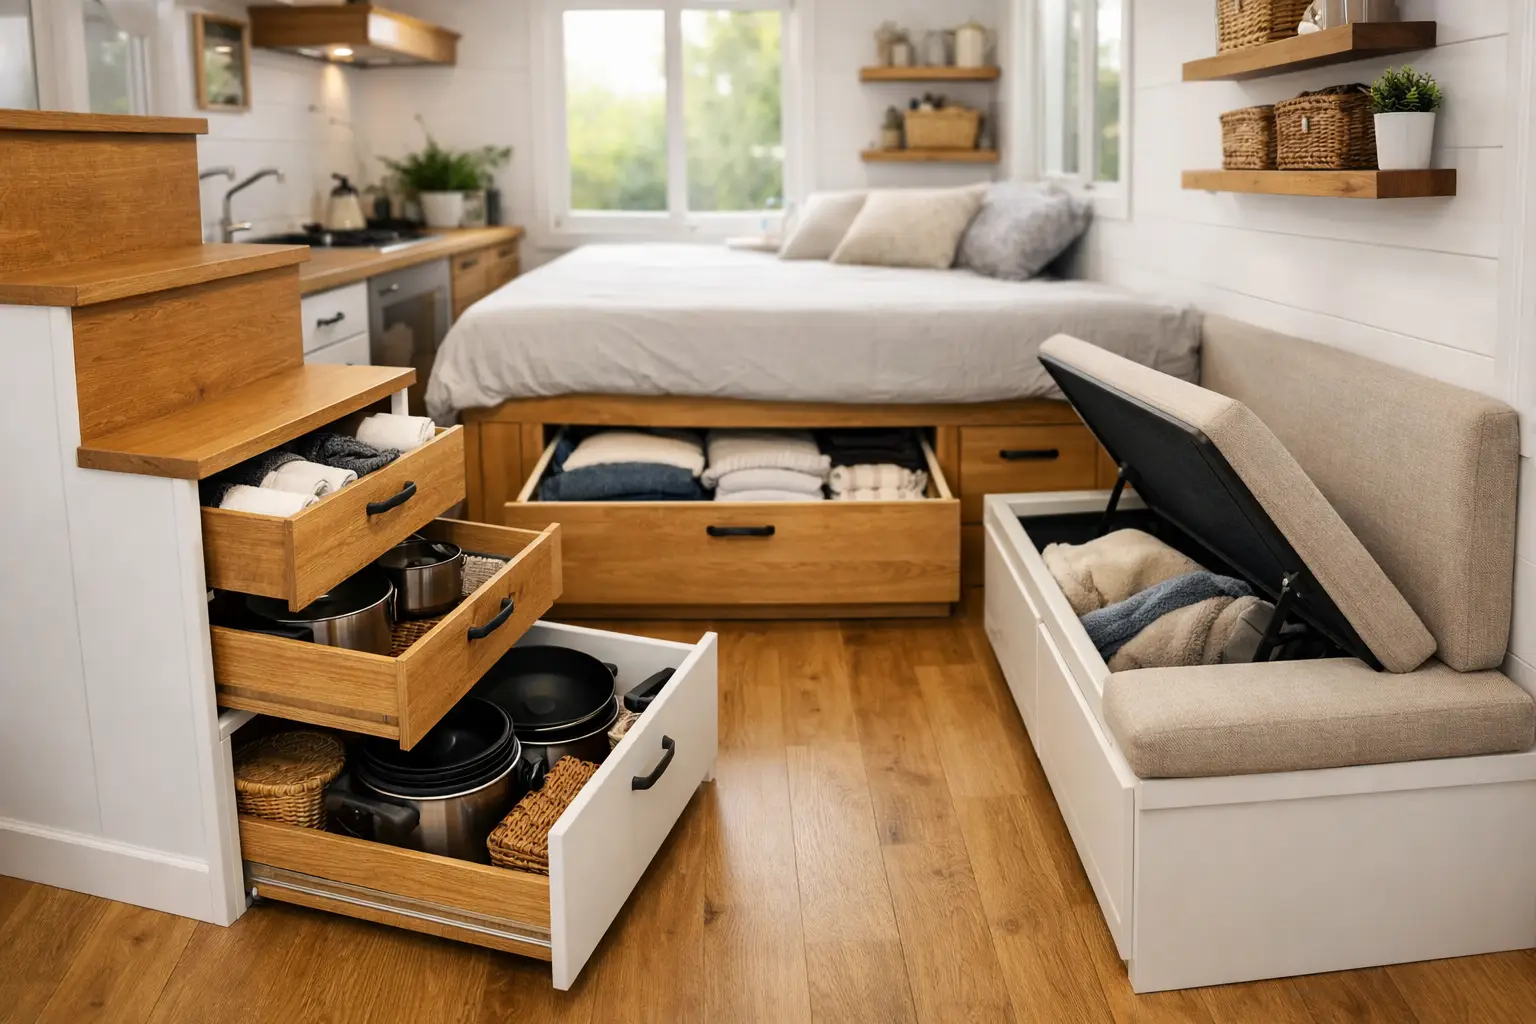
    A bench is not just seating in a tiny house. It can hold blankets, board games, extra pantry staples, dog gear, or a compact emergency kit. A lift-top bench along a wall creates generous hidden storage without adding visual clutter, while drawers below a built-in dinette are easier to access than one deep box.

    Choose the opening style based on your layout. Lift tops are excellent for bulky, less-frequent items, but they need clear space above them. Drawers cost a little more and use more hardware, yet they make daily access far more practical.

    2. Turn the bed platform into a real storage zone

    The area under a bed is one of the largest storage opportunities in a small home. Instead of treating it as a dark catchall, divide it by purpose. Use pullout drawers or labeled bins for clothing, linens, outdoor layers, and spare towels. If your bed is fixed, include access from the side as well as the foot whenever possible.

    For off-grid setups, reserve part of this zone for essentials that need protection: water filters, battery-powered lighting, cold-weather bedding, and backup charging gear. Keep moisture-sensitive equipment in sealed containers, especially if the tiny house is used seasonally or travels through humid climates.

    3. Use vertical space, but keep it visually calm

    Walls carry more potential than most tiny-home plans allow. Shallow shelves above doorways, a rail system in the kitchen, and slim cabinets that reach toward the ceiling can reclaim square footage without narrowing the walkway.

    The key is restraint. Open shelving makes a home feel personal, but too many mismatched objects can make it feel busy fast. Keep open shelves for a limited set of good-looking, frequently used items. Use closed storage for cables, packaged food, toiletries, and everything else that does not improve the room at a glance.

    4. Create a drop zone by the door

    Tiny homes get messy at the entrance because every trip outside brings back shoes, jackets, keys, tools, and trail dust. A narrow entry zone with wall hooks, a shoe drawer, and one small tray for keys prevents the rest of the home from becoming the landing spot.

    If your tiny house supports weekend escapes, add a dedicated place for headlamps, a compact first-aid kit, and rechargeable lanterns. This is one of those small systems that feels almost invisible until you no longer have to search for basics when daylight is fading.

    5. Make kitchen drawers work harder than cabinets

    Deep cabinets invite clutter because items disappear behind one another. Drawers, pullout shelves, and vertical dividers make small kitchens more functional because every item stays visible. Store plates and bowls in a deep drawer near the dining area, pans near the cooktop, and food prep tools close to the main counter.

    Use narrow vertical slots for cutting boards, baking sheets, and collapsible drying racks. A simple drawer divider can keep utensils, lighters, spice packets, and tea supplies from becoming one tangled category. In a small kitchen, reaching for one thing should not require reorganizing five.

    6. Add a slim pantry where a standard cabinet will not fit

    A pullout pantry can fit in a surprisingly narrow gap beside a refrigerator, beside a wall, or at the end of a cabinet run. It is ideal for dry goods, jars, coffee, and compact cooking supplies. Because both sides are accessible, it prevents the forgotten-food problem common in deep cupboards.

    For a cabin or solar-supported retreat, organize food in layers: everyday meals at hand height, backup staples lower down, and lighter supplies above. Keep your inventory modest. Bulk buying can make sense far from town, but only if the storage stays dry, secure, and easy to rotate.

    7. Put doors to work

    Cabinet and closet doors are useful real estate for shallow storage. Mount racks for cleaning supplies, wrap organizers, spices, toiletries, or small tools. The best use depends on the door depth and what sits behind it, so measure before committing.

    Avoid overloading lightweight doors. A few well-chosen items are better than a crowded organizer that rattles while traveling or strains the hinges. This is especially true in mobile tiny homes, where storage needs to stay secure on the road.

    8. Choose furniture with a second purpose

    A storage ottoman can be a footrest, guest seat, and blanket bin. Nesting tables can expand when friends visit and tuck away afterward. A fold-down desk can support focused work without permanently claiming your living area.

    Multipurpose furniture works best when its second function matches your real routine. If you rarely host overnight guests, a complicated convertible sofa may not be worth the daily effort. A comfortable fixed lounge with hidden storage may serve your life better.

    9. Use ceiling-height cabinets for low-frequency items

    High cabinets are perfect for seasonal clothing, extra paper goods, holiday items, and gear you only need for particular conditions. They are less useful for objects you need every day, so do not put your coffee, cookware, or charging cords up there just because there is room.

    Use identical labeled containers to make this storage feel intentional instead of forgotten. A compact folding step stool is worth having, but it should have its own home too. The goal is convenient access, not a new obstacle course.

    10. Divide utility storage from living storage

    A tiny house needs room for the practical side of independence: hoses, tools, power accessories, filters, leveling blocks, and maintenance supplies. These items deserve a distinct utility zone rather than being mixed with clothes or kitchen gear.

    A lockable exterior compartment is ideal for dirty or weather-exposed equipment. Inside, use one contained cabinet or bench compartment for clean utility items. Keeping these categories separate protects your living space from grit and makes pre-trip preparation much faster.

    11. Store gear by the moment you use it

    Organization becomes easier when it follows behavior, not room labels. Keep hiking layers, sunscreen, and water bottles near the door. Store coffee tools together, even if one item might technically belong in a different drawer. Place night reading, charging cables, and a flashlight near the bed.

    This approach reduces the number of steps required to use your home. It also reveals what you do not need. If an item never earns a place near a real activity, it may not deserve valuable square footage.

    12. Protect empty space on purpose

    Not every available inch should become storage. A clear counter, an open patch of floor, and a shelf with breathing room make a small home feel more restful. They also give you space to unpack groceries, repair gear, or simply sit with a cup of coffee without moving things around first.

    This is the trade-off behind every smart storage decision. More containers and cabinets can hold more, but they can also make a tiny home feel heavy. Aim for enough capacity to support your lifestyle, not enough capacity to avoid choosing what matters.

    Make Storage Part of Your Tiny Home Design

    The strongest storage plan is built before the house is full. Map your daily routines, identify the gear your location requires, and decide which items need immediate access. If you are building or remodeling, prioritize drawers over deep lower cabinets, include charging access where devices actually live, and plan dedicated space for water, power, and maintenance equipment from the start.

    For existing homes, improve one friction point at a time. Begin with the entry, kitchen, or bed platform – the areas that tend to carry the most daily traffic. Thoughtful organizers, modular bins, and compact multipurpose pieces can make a major difference without a full renovation.

    At Off The Grid Store, we see storage as part of self-reliance, not a decorative afterthought. When your home supports the way you cook, rest, travel, and recharge, living with less starts to feel less like compromise and more like room to breathe.

    The best system is the one that lets you come home, put everything down with ease, and get back to the life you chose the tiny house for in the first place.

  • Folding Solar Panel Review for Modern Off-Grid Life

    Folding Solar Panel Review for Modern Off-Grid Life

    A folding solar panel earns its place when it removes friction from getting outside or living with less dependence on the grid. This folding solar panel review focuses on what actually matters after the unboxing: how much power reaches your battery, how easily the panel fits into your routine, and where portable solar has real limits.

    For a cabin weekend, a converted van, or a quiet campsite where you still want lights, refrigeration, and a charged phone, portability is more than a convenience. It is the difference between a system you use often and one that stays in storage. The best folding panels make self-powered living feel straightforward without asking you to turn every trip into a technical project.

    What a Folding Solar Panel Does Well

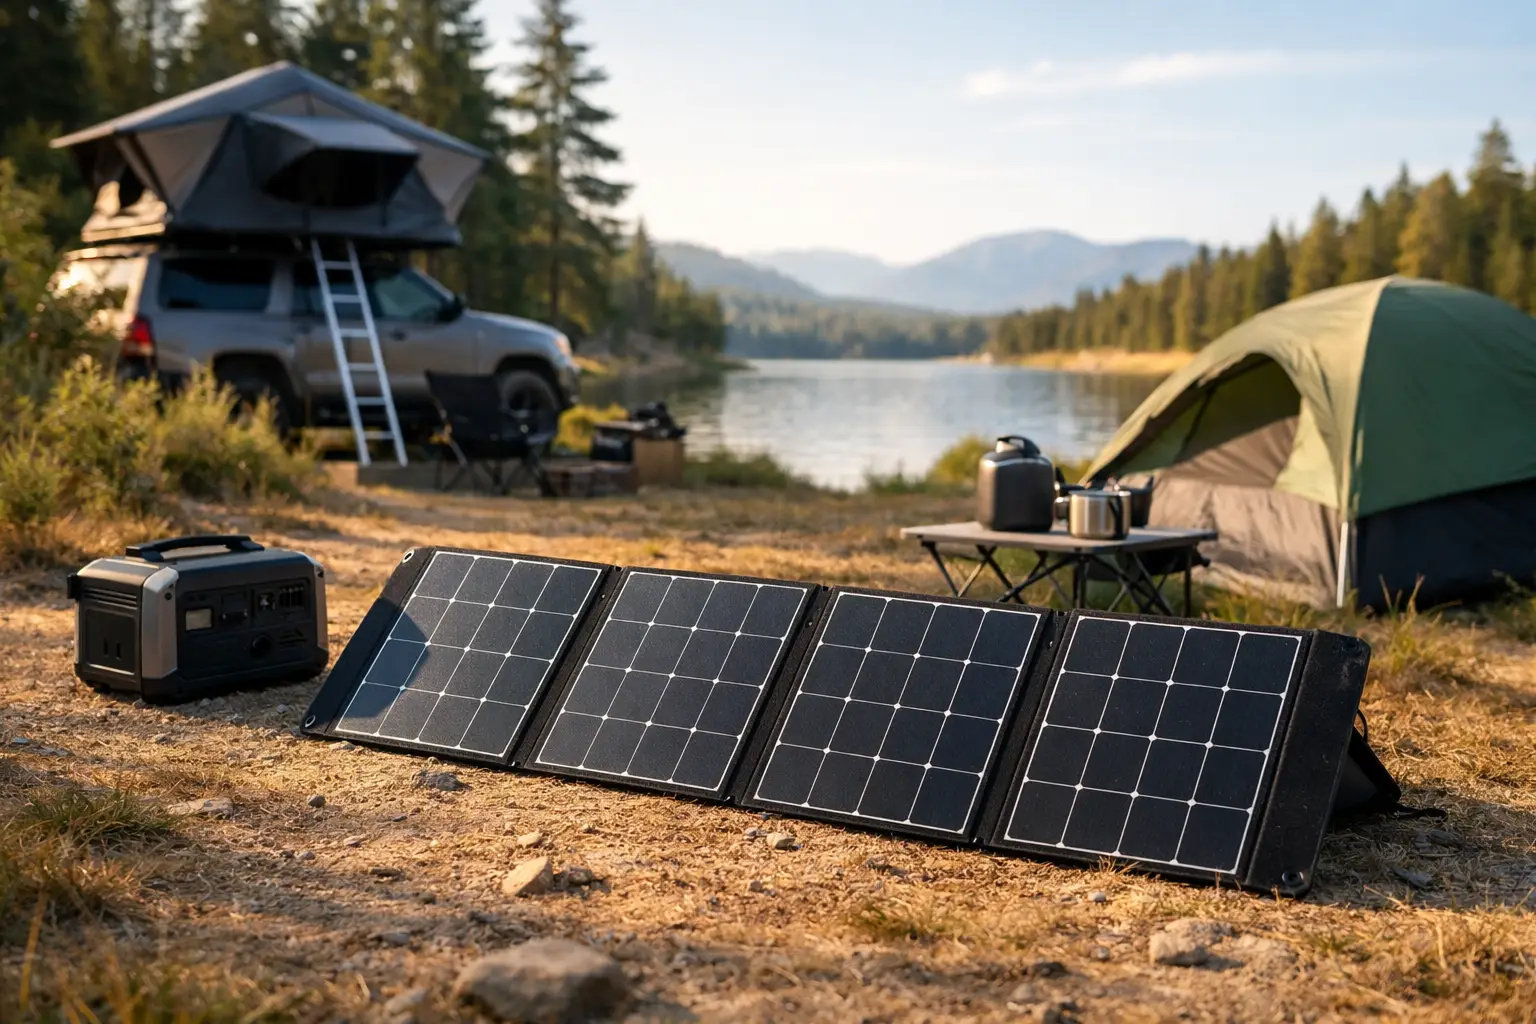
    A folding solar panel is a portable array of photovoltaic cells that opens like a briefcase or fabric-backed mat. Most connect directly to a compatible portable power station or to a battery through a solar charge controller. When it is time to leave, it folds down for the trunk, gear closet, or under-seat storage.

    Its greatest strength is flexibility. A fixed roof panel can produce power all day, but its angle and location are permanent. A folding panel can move with the sun. You can place it beyond the shade of your cabin porch, turn it toward the morning light, or keep it beside the vehicle while the vehicle remains cool under trees.

    That freedom comes with a trade-off. Portable panels need to be carried out, positioned, adjusted, and packed away. They can also be vulnerable to wind, passing weather, and theft if left unattended. For a full-time tiny home with dependable sun exposure, roof-mounted solar is often the better foundation. For weekend use, backup power, seasonal cabins, and travel, folding panels can be the more useful first purchase.

    Folding Solar Panel Review: The Specs That Matter

    The wattage printed on a panel is useful, but it is not a promise of daily production. A 200-watt folding panel only reaches that peak in strong, direct sunlight under ideal test conditions. In normal use, output shifts with cloud cover, heat, season, panel angle, cable losses, and battery state of charge.

    A better question is: what do you need to run, and how long do you have to recharge? If your goal is keeping phones, headlamps, a fan, and a compact power station ready for the evening, a 100-watt panel may be enough in favorable weather. If you need to replenish a larger battery that supports a cooler, CPAP machine, laptop work, or a small refrigerator, 200 watts or more is a more realistic starting point.

    Rated wattage and real-world output

    Expect a panel to produce less than its nameplate rating much of the time. A practical planning range is often 60 to 80 percent of rated output during a strong solar window, though conditions can fall well below that. This is not a flaw unique to folding panels. It is simply how solar works outside a laboratory.

    The useful comparison is watt-hours, not watts alone. A 200-watt panel producing an average of 140 watts for five good hours delivers roughly 700 watt-hours. That could substantially refill a modest power station, but it may not cover both a refrigerator’s daily draw and a full evening of high-consumption appliances. Build around your actual loads, then leave room for weather.

    Battery and connector compatibility

    Before buying, check the input limits of your power station or charge controller. A panel can have the right wattage yet still be incompatible because its voltage, connector type, or amperage falls outside what your equipment accepts.

    Common connectors include MC4, Anderson, DC barrel plugs, and proprietary inputs. Adapters can be useful, but they should not be an afterthought. A tidy, purpose-built connection is safer and easier to troubleshoot than a chain of adapters at the campsite. If you are connecting to a bare battery rather than an all-in-one power station, use a properly sized solar charge controller. Never connect a panel directly to a battery.

    Weight, folded size, and setup design

    A larger panel usually captures more energy, but it also demands more from your storage and your back. A rigid 200-watt suitcase panel may weigh 35 to 50 pounds. Flexible fabric-style panels can weigh much less, although they may sacrifice durability, stand stability, or performance in less-than-perfect light.

    Look closely at the legs, hinges, handles, cable length, and case. A panel that takes two minutes to deploy is more likely to be aimed well and used every day. A short cable can force you to park your power station in the sun, which is not ideal for battery longevity. A long cable offers better placement, but should be thick enough to minimize voltage drop.

    The Best Size for Your Setup

    There is no single best folding panel. The right choice depends on whether solar is supporting a few essential comforts or carrying a larger share of your energy independence.

    For a day trip or emergency kit, a compact 60- to 100-watt panel pairs well with a small battery pack. It handles communication, lighting, camera batteries, and modest device charging without adding much bulk. This is a practical option for people who want a calm, reliable backup rather than a full mobile power system.

    For weekend camping, car travel, and light cabin use, 100 to 200 watts offers a strong balance of portability and capability. It can keep a medium portable power station topped up when the weather cooperates, especially if you prioritize efficient appliances and charge during daylight.

    For extended stays at a remote cabin, a tiny home build, or regular work from the road, consider 200 to 400 watts of portable solar alongside a battery sized for overnight use. At this point, folding panels may be part of a hybrid approach: portable panels for adjustable sun exposure and fixed panels for consistent baseline generation.

    Conditions That Change the Result

    Solar panels are simple, but their environment is not. A panel laid flat on the ground will still collect energy, yet tilting it toward the sun can make a meaningful difference, particularly in spring, fall, and winter when the sun sits lower.

    Shade is the bigger issue. Even partial shade across part of a panel can cut output sharply. Avoid positioning beneath thin branches, beside a tall vehicle, or near a roofline that casts moving shadows. Clear morning and afternoon exposure often matters more than chasing a perfect angle every hour.

    Heat also affects production. Panels need sunlight, not excessive heat. A panel with airflow behind it can perform better than one pressed against hot ground or a dark vehicle hood. Keep the surface clean as well. Dust, pollen, salt spray, and bird droppings are small things that quietly reduce the power you expected.

    What We Would Look for Before Buying

    A premium folding solar panel should feel like a dependable piece of travel gear, not a fragile gadget. Prioritize a weather-resistant construction, reinforced corners, secure kickstands, and a protective case that will survive repeated loading and unloading. Water resistance is valuable, but it does not mean the panel, connectors, and power station should sit outside in heavy rain.

    Also consider the brand’s stated warranty and whether replacement cables and adapters are available. Portable solar gets moved, bent, stepped around, and exposed to changing conditions. Support matters when your system becomes part of your regular escape plan.

    Finally, resist buying more panel than your battery can accept. If a power station has a 120-watt solar input limit, attaching 400 watts of panel capacity will not produce 400 watts into that unit. Extra capacity can help in weak light in some configurations, but only if the equipment’s voltage and current limits allow it. Start with a compatible system, then expand with purpose.

    A Better Way to Use Portable Solar

    The most satisfying off-grid setups are built around rhythm, not constant monitoring. Set the panel out after breakfast, position it in clear sun, and let it replenish your stored energy while you hike, read, work on the cabin, or simply spend time offline. Bring the power station inside or into shade, and use that stored energy after sunset.

    That pattern protects your gear and preserves the point of being away: more quiet, more choice, and fewer cords dictating the day. Off The Grid Store approaches solar-ready living in that spirit – capable enough for modern comfort, simple enough to leave room for the life you came out there to enjoy.

    A folding solar panel will not make every cloudy weekend power-rich, and it is not a substitute for thoughtful energy use. But matched to the right battery, loads, and expectations, it gives you something more valuable than a fully charged device: the confidence to stay longer, travel lighter, and make your own power where you choose.

  • How to Choose Solar Ready Appliances Wisely

    How to Choose Solar Ready Appliances Wisely

    A quiet cabin morning can feel completely self-sufficient until the coffee maker trips the inverter. Learning how to choose solar ready appliances starts with that practical truth: the best appliance is not simply labeled “solar ready.” It fits the way you live, the size of your solar system, and the level of comfort you want when the grid is nowhere nearby.

    For a tiny home, weekend retreat, camper, or full-time off-grid setup, every watt has a job. Choosing well lets you keep the comforts that make your space feel like home without building an oversized, expensive power system around one demanding appliance.

    What “Solar Ready” Actually Means

    “Solar ready” is useful shorthand, but it is not a standardized appliance category. A product may use the phrase because it is energy efficient, because it can run on a battery-backed inverter, or because it accepts low-voltage DC power directly. Those are very different things.

    Most households use conventional AC appliances powered by an inverter. This is often the simplest route because it gives you more choice in finish, capacity, and performance. A solar-ready AC appliance should have low everyday energy use, reasonable startup demand, and a power draw your inverter and battery bank can support.

    Some appliances run on 12V, 24V, or 48V DC. These can be excellent for small cabins, vans, and compact systems because they avoid some inverter losses. The trade-off is a narrower product selection, specialized wiring, and less flexibility if you later change system voltage. DC is not automatically better. It needs to match the system you are building.

    The label matters less than the numbers. Look for rated watts, daily energy consumption, voltage, startup or surge power, and operating temperature range. If a manufacturer does not make those details easy to find, treat that as a reason to pause.

    Start With Your Real Life, Not a Product Wishlist

    Your appliance plan should begin with the rhythms of your space. A weekend cabin occupied by two people has different demands than a family tiny home or a remote work retreat where laptops, lights, refrigeration, and internet equipment run every day.

    Think in routines. What must work after a cloudy afternoon? What can wait for bright midday solar production? A refrigerator is a constant load. A blender may run for two minutes. A washing machine, induction cooktop, space heater, and electric kettle can each draw significant power, even when their total run time is short.

    This distinction helps you protect the feeling you are after. Off-grid living does not require giving up comfort. It asks you to choose comfort with intention. A smaller, efficient refrigerator and a propane or wood-fired heating plan may create a calmer, more resilient setup than trying to power full-size electric heating from a modest battery bank.

    Separate essential loads from flexible loads

    Start with essentials: refrigeration, water pumping, lighting, basic cooking, ventilation, communications, and medical equipment where applicable. These are the appliances and systems that need dependable power through poor weather.

    Then identify flexible loads. Laundry, vacuuming, countertop cooking, power tools, and water heating can often happen when batteries are full and solar production is strong. This does not mean living by a strict schedule. It means designing a system that gives you options instead of surprises.

    Size Appliances by Watt-Hours, Not Just Watts

    Watts tell you how much power an appliance uses at a particular moment. Watt-hours tell you how much energy it uses over time. For solar planning, both matter.

    Use this simple calculation:

    Watts × hours used per day = watt-hours per day

    A 60-watt fan running for eight hours uses about 480 watt-hours per day. A 1,500-watt kettle used for four minutes uses roughly 100 watt-hours. The kettle has a much larger instant draw, but the fan may consume more energy across the day.

    Add the estimated daily watt-hours for every appliance you expect to use. Then include room for inverter losses, battery charging losses, seasonal changes, and the inevitable device you forgot to count. A 20 to 30 percent planning margin is often sensible, though a remote, year-round home may need more depending on local weather and backup options.

    Startup power deserves separate attention. Compressor-based refrigerators, freezers, pumps, and air conditioners can require a brief surge above their normal running wattage. Your inverter must handle that surge, even if your daily energy total looks modest. Check the appliance documentation and compare it with both the inverter’s continuous rating and surge rating.

    Prioritize Efficiency Where It Has the Biggest Impact

    Not every appliance deserves the same level of scrutiny. Focus first on loads that run for hours or operate every day. A refrigerator, freezer, water pump, ventilation fan, and internet setup have a greater effect on your energy budget than a toaster used occasionally.

    For refrigeration, look beyond the exterior size. Check annual kilowatt-hour use, usable interior capacity, compressor type, and the temperature conditions where it will operate. A highly efficient unit can save enough daily energy to reduce pressure on your batteries, especially in summer heat or during a stretch of cloudy weather.

    For cooking, high-wattage electric appliances are not always a bad choice. Induction can be fast, clean, and efficient at the pan, making it appealing for a well-sized solar system. But it can place a heavy demand on the inverter and battery bank. A compact induction burner used during sunny hours may be a better fit than a large electric range used at night.

    Heating is where many first-time off-grid plans become unrealistic. Resistance heaters, electric water heaters, and clothes dryers consume a great deal of energy. In most small-scale solar setups, propane, wood, solar thermal, heat-pump technology, or air drying will be more practical. The right answer depends on your climate, insulation, occupancy, and willingness to use a backup fuel source.

    Match Voltage and Electrical Design Before You Buy

    A 12V appliance can be a smart choice for a small mobile setup. For a larger cabin or tiny home, 24V or 48V battery systems often move power more efficiently and can support bigger loads with less current. That does not mean every appliance needs to match battery voltage directly. It means the electrical design should be decided before purchases begin.

    If you are using AC appliances, confirm that your inverter provides the correct voltage and frequency for US products: typically 120V and 60 Hz. For larger equipment, verify whether it requires 240V split-phase service. A standard portable inverter may run lights and a refrigerator beautifully but will not necessarily support a well pump, range, or mini-split designed for 240V.

    Also consider appliance controls. Some modern appliances have electronic boards, Wi-Fi features, and sensitive startup behavior that may not play well with a low-quality modified sine wave inverter. A pure sine wave inverter is generally the better choice for reliable appliance operation and quieter performance.

    Choose Durability and Repairability Over Extra Features

    Off-grid appliances work in places where service calls can be inconvenient and expensive. A good product should be efficient, but it should also be built for the conditions around it: dust, temperature swings, limited ventilation, travel, or occasional periods of nonuse.

    Simple controls can be an advantage. A refrigerator with a clear thermostat and accessible replacement parts may serve a cabin better than a feature-heavy model that depends on an app connection. For water pumps, look for proven components, easy winterization, and available repair kits. For laundry, a compact washer with lower water use may be more valuable than a large machine with a long list of cycles.

    This is also where sizing down can improve the experience. A smaller appliance is often easier to power, transport, maintain, and integrate into a thoughtful small-space layout. Freedom is not measured by how much equipment you can fit into a system. It is measured by how confidently the system supports your life.

    Read Energy Labels With a Critical Eye

    Energy labels are a useful starting point, especially for refrigerators, dishwashers, and laundry equipment. Still, they reflect standardized test conditions, not every real-world scenario. A refrigerator in a hot, unconditioned shed will use more energy than the same unit in a climate-controlled kitchen.

    Compare models using annual energy consumption, but also look for actual user manuals. Manuals often reveal running watts, circuit requirements, clearance needs, and temperature limits that marketing pages leave out. If you are deciding between two similar appliances, the one with clearer specifications is usually the safer choice for a self-powered setup.

    Build in a Little Future Flexibility

    Your first solar setup does not need to power every possible appliance on day one. It should support the life you plan to live now while leaving a sensible path for growth. Choose an inverter, charge controller, battery configuration, and electrical panel that can expand if you expect to add solar panels, a freezer, or a workshop load later.

    Avoid buying an appliance solely because it might suit a future system. Buy for the system and lifestyle you have planned, then leave space to evolve. A well-chosen solar-ready appliance should make your retreat feel easier to use, not turn every cloudy day into a calculation.

    The strongest off-grid spaces are not the ones packed with the most technology. They are the ones where every appliance earns its place, energy feels abundant enough, and you can step away from the noise knowing your home still has what it needs.

  • Portable Battery vs Gas Generator: Which Fits?

    Portable Battery vs Gas Generator: Which Fits?

    A quiet cabin morning changes the question. You are not only asking what can run a coffee maker or keep food cold. You are deciding what kind of retreat you want to create. In the portable battery vs gas generator decision, the right answer depends on your power needs, your tolerance for noise and fuel, and whether you want electricity to support a slower, more self-directed way of living.

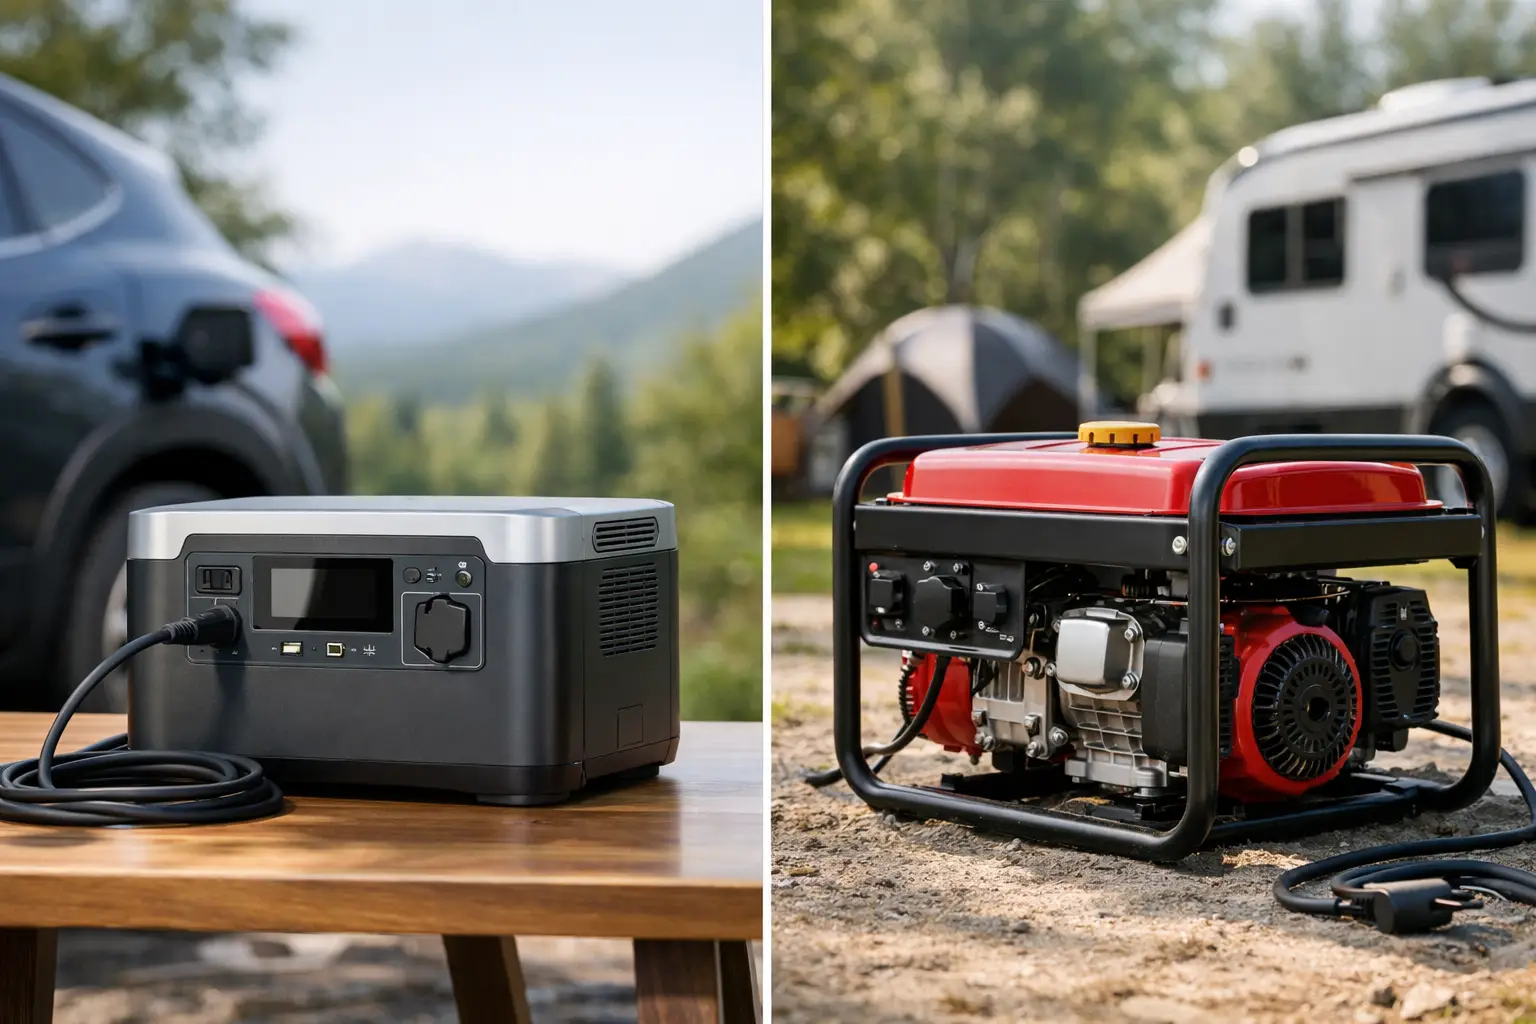
    A portable power station and a gas generator can both keep essential gear running away from the grid. They do it in very different ways. One stores electricity for clean, nearly silent use. The other creates electricity on demand by burning fuel. Neither is automatically better. The practical choice comes down to how long you need power, what you need to run, and how permanent your off-grid plans are.

    Portable Battery vs Gas Generator: The Core Difference

    A portable battery, often called a power station, stores electricity in an internal battery. You charge it from a wall outlet, vehicle outlet, solar panels, or a generator, then use its AC, USB, and DC outputs to power devices. It produces no exhaust at the point of use and operates quietly enough for a tent, tiny home, or cabin bedroom.

    A gas generator converts gasoline, propane, or dual-fuel supply into electricity while it runs. As long as you have fuel and the generator is maintained, it can continue producing power. That makes it a strong option for extended outages, power-hungry tools, and situations where solar charging is limited.

    The distinction matters because stored power has a finite capacity, while generated power has a fuel-dependent runtime. A battery station may be the more peaceful fit for a weekend escape. A generator may be the more practical choice when a storm takes out utility power for several days.

    Choose a Portable Battery for Quiet, Everyday Freedom

    Portable batteries are built for the moments when power should stay in the background. They are especially well suited to charging phones and cameras, powering laptops, running lights, keeping a CPAP operating overnight, and supporting a small fridge or cooler. Many can also handle appliances like a coffee maker, blender, projector, electric blanket, or compact microwave, provided the unit has enough output and capacity.

    For cabins, vans, tent sites, and tiny homes, silence is a real benefit. You can charge gear before sunrise without filling the woods with engine noise. You can work remotely from a solar-supported retreat without the smell of fuel near your living space. And because there are no fumes, a battery can be used indoors when ventilation and placement requirements are followed.

    Solar charging is where the battery approach becomes more independent. A properly sized panel setup can refill a power station during the day, then carry lighting, refrigeration, and personal electronics through the evening. It will not create unlimited power, especially during overcast weather or winter months, but it can greatly reduce your dependence on fuel runs and crowded campgrounds with electrical hookups.

    Battery power also requires less routine maintenance. There is no oil to change, carburetor to clean, or stale fuel to manage. For people building a simpler relationship with energy, that ease has value.

    Where Portable Batteries Have Limits

    A battery station is not a substitute for every electrical demand. Capacity is measured in watt-hours, and that number determines how much energy you have available. A 1,000 watt-hour battery can theoretically run a 100-watt device for about 10 hours, though conversion losses and real-world conditions reduce that estimate.

    High-draw appliances can drain a battery quickly. Electric space heaters, air conditioners, hot plates, full-size refrigerators, well pumps, and large power tools often require substantial output and use a great deal of energy over time. Some power stations can start these loads, but that does not mean they can run them for long.

    Recharge time is another consideration. Wall charging may be fast on some models, while solar charging varies with panel wattage, sun angle, weather, and season. If you need dependable power through several cloudy days, you will need adequate battery capacity, a realistic solar plan, or a backup charging source.

    Choose a Gas Generator for Heavy Loads and Long Outages

    A gas generator makes sense when the job is larger than a battery bank can comfortably handle. It can run power tools during a build, support a sump pump during an outage, recharge batteries quickly, or keep a refrigerator and freezer operating when bad weather lingers. For a rural property without a complete solar system, it can be a reliable bridge between utility dependence and full energy independence.

    Generators are rated by running watts and surge watts. Surge capacity matters because motors often need a higher burst of power to start. A fridge compressor, circular saw, or well pump may have a modest running draw but a significant startup demand. Selecting a generator based only on its maximum rating can lead to frustrating overloads, so calculate the devices you expect to run at the same time.

    Fuel availability gives generators their staying power. With safely stored fuel, a generator can run for days in intervals, rather than being limited by what was charged before the outage. Propane is especially appealing for some off-grid properties because it stores longer than gasoline and may already serve a cooktop, heater, or water heater.

    The Trade-Offs of Generator Power

    A generator asks more of your routine. It needs fuel, periodic maintenance, and safe storage. Gasoline degrades, oil must be checked, and engines can become unreliable when they sit unused for too long. A generator that is only tested after an emergency is not a dependable backup plan.

    Noise is the other major trade-off. Inverter generators are quieter and provide cleaner power for sensitive electronics than conventional models, but they are not silent. At a peaceful campsite or a compact cabin site, that sound can shape the entire atmosphere. Fuel exhaust also means generators must always run outdoors, well away from doors, windows, vents, and occupied areas. Never operate one in a garage, shed, tent, or enclosed porch, even if the door is open.

    Start With Your Real Power Needs

    The smartest purchase begins with a simple audit, not a product label. Look at each device’s wattage label, then estimate how many hours you will use it each day. Watts tell you the rate of power use. Watt-hours tell you the total energy required.

    A 60-watt laptop used for five hours needs roughly 300 watt-hours. A 700-watt coffee maker used for 10 minutes uses far less energy than its wattage suggests, around 117 watt-hours. A 1,500-watt space heater used for six hours, however, needs about 9,000 watt-hours. That one comfort appliance can completely change the size and cost of your system.

    Also separate essentials from conveniences. At a cabin during a short outage, essentials may be refrigeration, lights, a phone, a router, and medical equipment. At a remote workshop, essential loads may include tools and battery chargers. This clarity helps you avoid paying for oversized equipment or discovering too late that a compact battery cannot support an electric heating lifestyle.

    The Best Setup Is Often Both

    For many intentional off-grid spaces, the strongest answer is not portable battery or gas generator. It is a layered system.

    Use a portable battery for daily power: lights, devices, small appliances, and overnight needs. Add solar panels to keep it topped up when conditions allow. Keep a quiet inverter generator as a backup for prolonged storms, heavy workdays, or fast battery recharging. This approach protects the calm of everyday life while giving you a practical reserve when nature does not cooperate.

    A hybrid setup also lets you buy in stages. Start with the battery capacity that supports your weekend retreat, then add solar as your routine becomes clearer. If you later spend longer stretches at the cabin or transition into tiny-home living, a generator can provide confidence without forcing you to build an oversized solar system from day one.

    Make Power Part of the Life You Want

    Choose a portable battery when quiet, clean indoor-capable power and solar readiness matter most. Choose a gas generator when you need sustained output for larger loads, long emergencies, or demanding projects. Choose both when you want comfort without pretending weather, seasons, and real energy use do not exist.

    At Off The Grid Store, we see power as more than a technical spec. It is the ability to keep what matters working while leaving more room for stillness, fresh air, and your own direction. Build for the way you actually live, then let your power system make that freedom feel easier to return to.

  • Is Off Grid Living Expensive? The Real Cost

    Is Off Grid Living Expensive? The Real Cost

    A quiet cabin morning can look wonderfully simple: coffee heating on a propane stove, sunlight reaching the solar panels, and no utility bill arriving at the end of the month. But is off grid living expensive? It can be, especially when independence is treated as a single purchase rather than a system built over time.

    The honest answer is that off-grid living has a high range of possible costs. A seasonal retreat built around modest power needs may cost less than a conventional home renovation. A full-time, code-compliant house on raw land with solar storage, a well, septic, and year-round access can require a serious investment. The difference comes down to your location, level of comfort, and willingness to design around what you truly need.

    Why Off-Grid Costs Are So Different

    Off-grid living shifts expenses instead of making them disappear. Rather than paying utility companies monthly, you invest in equipment and infrastructure that produce or manage your own resources. Solar panels replace part of an electric bill. A rainwater system, well, or hauled-water setup replaces a water connection. Batteries provide power after sunset. A composting toilet may reduce the need for a septic system, depending on local rules.

    That shift can feel expensive upfront because several major decisions arrive at once. Land, shelter, power, water, waste, heating, storage, and access all need a plan. Yet it also creates control. You can build a setup that reflects how you actually live instead of paying for capacity you rarely use.

    A person using a compact cabin as a two-night escape has very different needs from a family living full time in a remote climate. The first may be comfortable with a small solar kit, a water tank, and a portable cooking setup. The second needs dependable winter heat, larger battery capacity, safe food storage, plumbing that will not freeze, and a backup plan for extended cloudy weather.

    The Major Expenses of Living Off Grid

    Land and access can set the whole budget

    Land is often the biggest variable. Remote acreage can appear affordable until you account for legal access, road work, clearing, grading, surveys, soil tests, and permits. A low purchase price is not automatically a low total cost.

    Before buying, understand the parcel’s zoning, building restrictions, flood risk, water rights, septic requirements, and road conditions in every season. Ask whether emergency vehicles, delivery trucks, and construction equipment can reach the site. If a property needs a new driveway, extensive excavation, or a bridge crossing, the budget can move quickly.

    Land closer to towns and existing services usually costs more upfront but may reduce complexity later. It can also make a phased build more realistic, since you have easier access to materials, maintenance, and support.

    Shelter is where lifestyle choices show up

    A simple, well-insulated small cabin can be more affordable to heat, furnish, and power than a larger home. That does not mean tiny automatically means cheap. Custom builds, foundation work, high-quality windows, and code requirements can add up fast.

    For some people, a travel trailer, converted van, or finished shed provides a lower-cost entry point while they learn the property. For others, a purpose-built tiny home offers better long-term comfort and a more intentional layout. The right choice is the one that matches your climate, timeline, and legal ability to occupy the structure.

    Spend where it protects everyday comfort: insulation, weatherproofing, ventilation, durable roofing, and efficient windows. A beautiful interior cannot compensate for a space that is damp, drafty, or difficult to heat.

    Solar is an investment, not just a panel count

    A small solar setup for lights, device charging, and a few low-draw appliances may be relatively accessible. A full-home system capable of running air conditioning, electric cooking, well pumps, laundry equipment, and multiple workstations costs considerably more, particularly when batteries are included.

    The key is to start with an energy audit. List what you use, how long you use it, and which items are nonnegotiable. Refrigeration, water pumps, internet equipment, medical devices, and heating controls deserve special attention. High-wattage appliances such as electric resistance heaters, dryers, and large air conditioners demand far more capacity than many new off-gridders expect.

    A practical system often combines solar with efficient appliances, thoughtful habits, and backup power for unusual weather. That is not a compromise in comfort. It is good design. An induction cooktop, efficient refrigerator, LED lighting, and a power station for flexible use can make a smaller system feel far more capable.

    Water and waste require a local plan

    Water solutions range from simple to substantial. Hauling water into a cistern can work well for a weekend cabin. Rain catchment can supplement supply where allowed and properly designed. Drilling a well may offer greater independence but can be unpredictable in price and success, particularly in challenging terrain.

    Waste systems are equally location-specific. A permitted septic system can be a major line item, while a composting toilet may lower installation needs in some settings. Local regulations decide what is legal, and a system that works beautifully on one property may not be permitted on another.

    Do not treat these as glamorous purchases. They are foundational. Clean water, responsible wastewater management, and reliable sanitation are what make a remote place feel calm rather than improvised.

    Ongoing costs still exist

    Off-grid living can reduce recurring utility expenses, but it does not eliminate maintenance. Batteries eventually need replacement. Filters, propane, firewood, generator fuel, pump repairs, road maintenance, insurance, property taxes, and occasional equipment upgrades belong in the long-term plan.

    Remote living can also carry a convenience cost. A forgotten fitting or failed inverter may mean a long drive, a shipping delay, or a service call with travel fees. Keeping essential spares and learning basic maintenance can save money and frustration.

    Is Off Grid Living Expensive Compared With Staying Connected?

    It depends on what you compare. If you already own a comfortable house with dependable utilities, building a fully independent system from scratch is rarely the cheapest immediate option. Grid power is often inexpensive to use once the connection is in place.

    But grid connection is not always available or affordable. Extending power lines to a remote building site can cost tens of thousands of dollars or more, depending on distance and terrain. In that case, a well-designed solar and battery system may be the more sensible investment.

    Off-grid living also has value beyond the monthly spreadsheet. It offers resilience during outages, more freedom in where you build, and a daily rhythm less dependent on external systems. Those benefits matter, but they should not be used to ignore the numbers. Independence feels best when it is financially sustainable.

    How to Keep an Off-Grid Build Within Reach

    The most reliable way to control cost is to build in phases. Start with the systems that make the property usable and safe, then expand as your real habits become clear. A weekend setup can reveal whether you need more battery storage, a larger water tank, or simply better insulation.

    Avoid oversizing early. Many first-time buyers purchase more solar capacity than they need while overlooking easy efficiency gains. Reducing unnecessary loads can cost far less than adding panels and batteries. Choose appliances with intention, use propane or wood strategically where appropriate, and design storage so you can buy supplies thoughtfully rather than constantly replacing them.

    It also helps to separate permanent infrastructure from portable gear. A quality power station, portable panels, water filtration, efficient lighting, and compact cooking equipment can serve you in a cabin, trailer, tent site, or future tiny home. These purchases let you build capability before every construction decision is final.

    Finally, protect the budget with a contingency fund. Remote projects uncover surprises: rock where a trench was planned, a failed pump, a permit requirement, or a road damaged by heavy rain. A realistic reserve is not pessimism. It is part of building a life with confidence.

    The Cost That Matters Most

    Off-grid living is expensive when it is rushed, oversized, or built without respect for the land and local requirements. It becomes far more attainable when you define your version of comfort, reduce demand before adding equipment, and grow the system in deliberate stages.

    The goal is not to prove you can live with less. It is to create a place that gives you more room to think, rest, travel, and choose your own rhythm. Start with one capable setup, learn what freedom looks like in your daily life, and let the next investment earn its place.

  • What Appliances Work Off Grid? A Practical Guide

    What Appliances Work Off Grid? A Practical Guide

    A quiet cabin morning does not have to mean cold coffee, dim rooms, or a lifestyle built around doing without. When people ask what appliances work off grid, the better question is: which appliances deliver real comfort without overwhelming your battery bank, solar array, or generator? The answer is more expansive than many first-time builders expect.

    Modern off-grid living is not about rejecting useful technology. It is about choosing it with intention. The right setup can support a well-equipped tiny home, a polished weekend retreat, an RV, or a full-time cabin while keeping your energy use predictable and your independence intact.

    What appliances work off grid?

    Most household appliances can work off grid if the power system is designed for them. But some are far better matches for solar-supported living because they use less electricity, run for shorter periods, or can operate on propane instead of power-hungry electric heating elements.

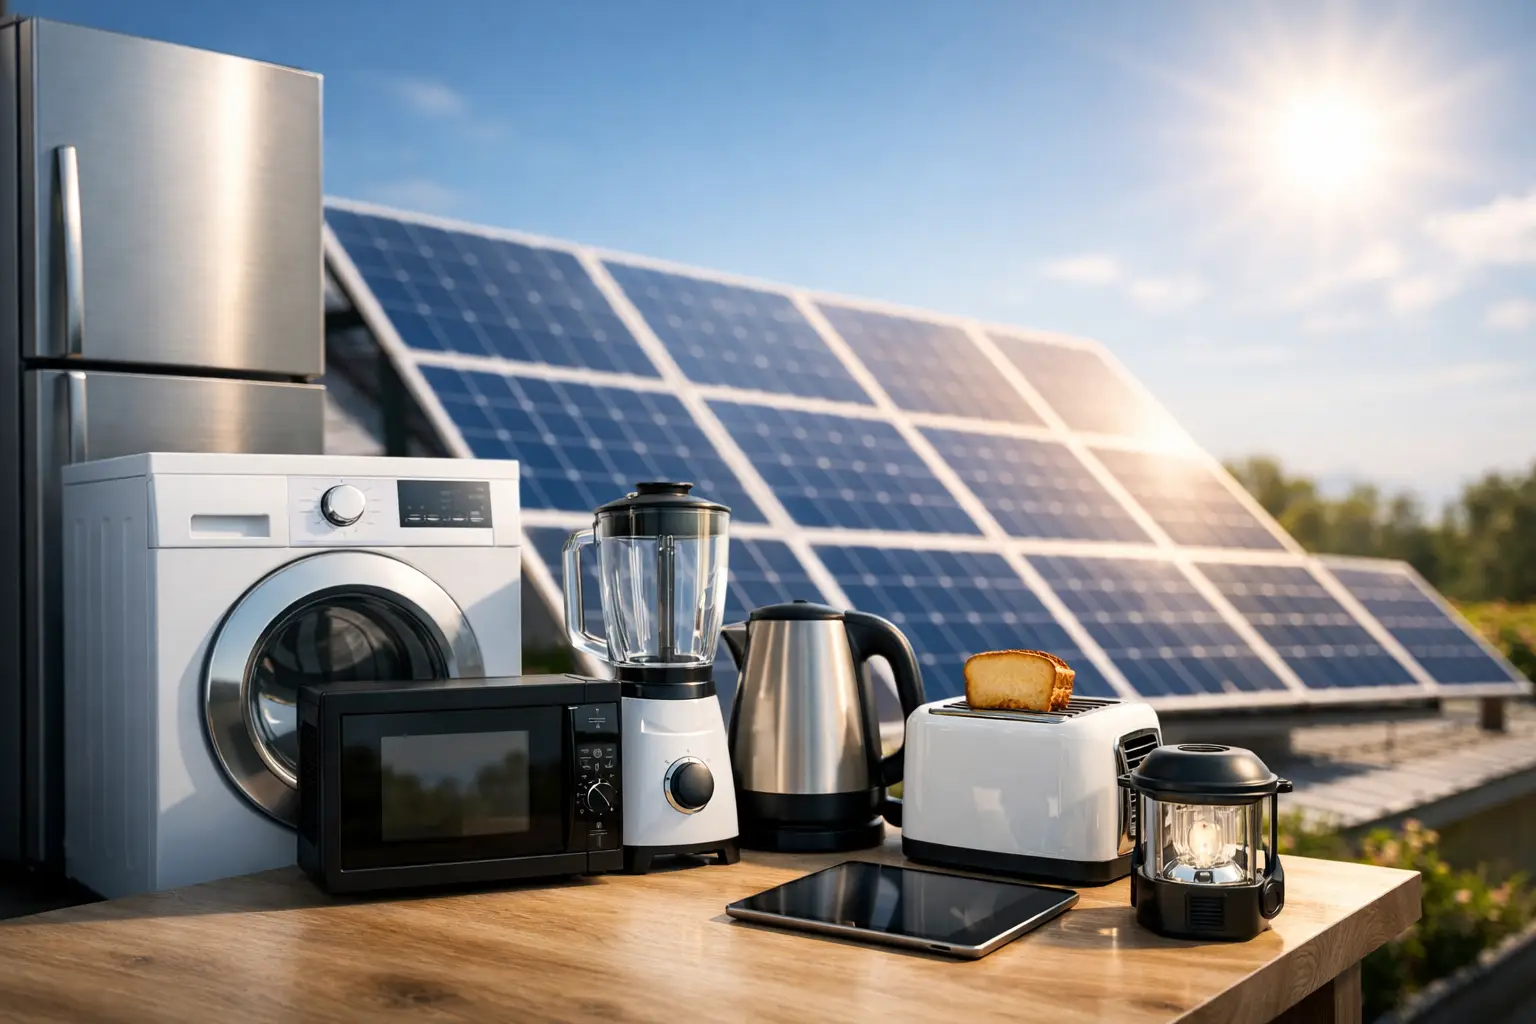
    Efficient lighting, refrigeration, water pumps, fans, electronics, laundry appliances, kitchen tools, and certain heating or cooking systems are all realistic options. The deciding factors are not simply whether an appliance is labeled “off-grid.” They are its wattage, how long it runs, whether it has a startup surge, and when you plan to use it.

    A 1,500-watt appliance used for ten minutes can be manageable. A 300-watt appliance that runs all day may be a much bigger demand. This is why good off-grid design starts with daily energy habits, not a shopping list.

    Start with the power system, not the appliance aisle

    Before choosing appliances, get clear on your available energy. A basic system includes solar panels to collect power, batteries to store it, an inverter to run standard AC appliances, and often a backup generator for extended cloudy weather or unusual demand.

    Battery capacity determines how much energy you can use after sunset. Solar production determines how quickly you can replenish it. Your inverter rating determines which appliances can run at one time. A compact retreat with lights, a small refrigerator, charging stations, and a water pump has very different needs than a home with electric heat, central air conditioning, and an induction range.

    Look at both watts and watt-hours. Watts measure the appliance’s draw at a given moment. Watt-hours show the total energy it uses over time. For example, a 60-watt fan running for eight hours uses roughly 480 watt-hours. That is usually easy to plan for. A 1,500-watt space heater running for eight hours uses 12,000 watt-hours, which can drain a modest battery bank quickly.

    Also account for startup surge. Refrigerators, well pumps, power tools, and compressors can briefly require several times their normal running wattage when they start. Your inverter must be able to handle that momentary demand.

    The best off-grid kitchen appliances

    The kitchen is where intentional choices pay off fastest. Refrigeration is usually a daily essential, and modern Energy Star refrigerators can be a practical fit when properly sized. A smaller, efficient fridge often makes more sense than a large residential model with an ice maker, even if you have room for it. Chest freezers can also be surprisingly efficient because cold air stays inside when the lid opens.

    For cooking, propane remains an excellent off-grid option. A propane range or cooktop removes one of the largest electrical loads from your battery system and performs reliably in every season. It is a strong choice for cabins and tiny homes where energy independence matters more than having an all-electric kitchen.

    Induction cooktops can work well too, particularly in solar-rich locations with a capable inverter and battery bank. They are efficient, fast, clean-lined, and appealing for design-forward small spaces. The trade-off is their high instant power draw. Many owners use a portable induction burner during sunny midday hours, then rely on propane or outdoor cooking when batteries need to stretch.

    Small appliances deserve the same scrutiny. Electric kettles, toaster ovens, air fryers, blenders, coffee makers, and microwaves are not automatically off limits. They simply work best as short-use appliances that fit your inverter capacity. A French press or manual grinder may feel more aligned with a slow cabin morning, but there is no rule against a well-timed espresso machine if your system can support it.

    Comfort appliances that make a retreat feel like home

    LED lighting is one of the easiest wins in off-grid living. It uses very little power, gives you flexible warm or task-focused lighting, and helps a compact home feel composed after dark. Pair it with thoughtful fixtures rather than treating lighting as an afterthought.

    Ceiling fans and efficient DC fans are also excellent choices. Moving air uses far less energy than air conditioning and makes warm spaces more comfortable in summer. In colder months, a fan can circulate warmth from a wood stove or propane heater.

    Heating is where the fuel choice matters most. Electric space heaters are simple but demanding, and they can consume more energy than a small solar setup can comfortably provide. Propane heaters, wood stoves, pellet stoves, and properly installed diesel heaters are often more realistic primary heat sources. Each comes with ventilation, safety, maintenance, and fuel-storage considerations, so choose based on the home, climate, and how often you will be there.

    Air conditioning is possible off grid, but it requires honest planning. A high-efficiency mini-split can be a smart solution for a well-insulated tiny home with a larger solar and battery system. For a seasonal cabin, shade, reflective window coverings, ventilation, insulation, and fans may offer a more efficient path to comfort. The goal is not to prove you can power every appliance. It is to build a space that stays comfortable without constant energy anxiety.

    Water, laundry, and cleaning appliances

    A pressure pump is central to a functional off-grid water system. Many 12-volt pumps are efficient and work directly from battery power, while AC well pumps may require a larger inverter and substantial startup capacity. If you use a well, pump specifications should influence your system design early.

    Tankless propane water heaters are a popular choice because they provide hot water without maintaining an electrically heated tank all day. Electric water heaters can work, especially when programmed to heat during peak solar production, but they are typically a major load. Heat-pump water heaters are more efficient than conventional electric tanks, though their fit depends on climate, space, and system size.

    Laundry is possible, with a few compromises. Compact front-load washers use less water and generally less energy than traditional top-load models. Cold-water cycles reduce demand further. A vented electric dryer is one of the harder appliances to justify on a modest system, while a propane dryer, ventless heat-pump dryer, clothesline, or drying rack can make more sense. For a weekend property, a beautiful drying rack near a sunny window may be more useful than an oversized laundry room.

    Vacuum cleaners, cordless tools, and small cleaning appliances are usually manageable when used briefly. Recharge them during the day, avoid running several high-draw appliances together, and keep a close eye on the energy budget after a stretch of poor weather.

    Appliances to approach with caution

    Some appliances are technically possible but can reshape the cost and complexity of the entire system. These include electric resistance heat, large conventional water heaters, full-size electric dryers, electric ovens used daily, hot tubs, pool pumps, and older air conditioners.

    That does not mean these choices are wrong. A larger year-round home in Arizona with abundant sun may support a mini-split system and induction cooking comfortably. A shaded forest cabin in the Pacific Northwest may benefit more from propane, wood heat, and lower-draw essentials. Location, insulation, seasonal use, and desired level of comfort all change the equation.

    The clearest rule is simple: avoid designing around peak demand you only need occasionally. It is often more affordable to use a propane appliance, schedule a task for sunny hours, or keep a backup option than to buy enough batteries and inverter capacity for every possible scenario.

    Build an appliance plan around your real life

    Make a list of the appliances you use daily, weekly, and rarely. Then separate essentials from conveniences. A refrigerator, lights, water pump, phone charging, and ventilation may be nonnegotiable. A countertop ice maker or electric blanket may be a welcome luxury, but it should not dictate the entire system.

    From there, calculate estimated daily watt-hours and consider when each appliance will run. Solar-powered living rewards timing. Run laundry, power tools, vacuuming, and high-draw kitchen appliances while panels are producing strongly. Reserve stored battery energy for nighttime lighting, refrigeration, water, and the calmer parts of your routine.

    Off The Grid Store approaches this lifestyle as a design decision as much as an energy decision. The most satisfying spaces are not packed with compromises. They are built around a few dependable, efficient essentials that support how you actually want to live.

    Choose appliances that make your place more livable, not more dependent. A well-made meal, hot shower, charged lantern, and quiet room can be more than enough proof that independence still has room for comfort.

  • Best Off Grid Lighting Solutions for Modern Living

    Best Off Grid Lighting Solutions for Modern Living

    A dark cabin should feel like a retreat, not a compromise. The best off grid lighting solutions create the kind of warm, useful light that lets you cook dinner, read late, find the trailhead before sunrise, and settle into a quieter rhythm without relying on the grid.

    For a tiny home, backcountry cabin, van, or solar-supported weekend escape, lighting is one of the fastest ways to make self-powered living feel considered and comfortable. The right setup is rarely one product. It is a layered system that pairs efficient task lighting with soft ambient light, dependable battery storage, and enough portable backup to keep your plans moving when weather changes.

    Start With How You Want to Use the Space

    Lighting decisions become easier when they begin with real life rather than a catalog. A one-room cabin used on weekends needs a different approach than a full-time tiny home, and a campsite has different demands than a remote workshop. Think about the moments that matter most: preparing food after sundown, working at a table, walking safely to an outdoor shower, or winding down without a harsh ceiling light overhead.

    A good off-grid setup usually has three layers. Ambient lighting fills a room gently. Task lighting puts clear brightness where you need it, such as over a counter or beside a bed. Accent lighting adds warmth and orientation, whether that is a small lamp in the corner or low-level path lights outside.

    This approach keeps you from overbuilding the system. Instead of installing powerful lights everywhere, you place efficient light where it earns its energy use. That is a more comfortable choice and a smarter one for your battery bank.

    Why LEDs Are the Foundation of Off-Grid Light

    LED lighting is the clear starting point for nearly every independent power setup. LEDs use far less power than incandescent or halogen bulbs, run cooler, and last substantially longer. Those benefits matter when every watt comes from a solar panel, a portable power station, or a carefully managed battery bank.

    For interior spaces, choose LED bulbs and fixtures in the 2700K to 3000K color temperature range. This produces a warm white glow that feels relaxed in a cabin, bedroom, or living area. Cooler light around 4000K can work well over a utility bench, in a gear room, or near a bathroom mirror where visibility matters more than atmosphere.

    Brightness matters too. Lumens measure light output, while watts tell you how much power a bulb consumes. A modern 800-lumen LED bulb can provide the familiar brightness of an old 60-watt incandescent while drawing only a fraction of the energy. In a compact space, that efficiency compounds quickly.

    Choose DC Fixtures When Building a Permanent System

    If your cabin or tiny home already runs on a 12V or 24V battery system, dedicated DC lighting can be a strong choice. These fixtures connect directly to the battery power and avoid the energy loss that comes from converting DC battery power into household AC power through an inverter.

    DC lights are particularly practical for ceiling fixtures, reading lights, and under-cabinet strips that will be used often. The trade-off is that they are more specialized than standard household lamps and may require more planning during installation. For a simple retreat or a rental-friendly setup, AC LED lamps powered by a quality inverter may offer more flexibility.

    Solar-Powered Lights for the Places Beyond the Wall

    Outdoor lighting should make an off-grid property easier to navigate without turning it into a floodlit compound. Solar path lights, motion-activated security lights, and portable lanterns each have a role, but they perform best when matched to their purpose.

    Solar path lights are ideal for marking a short route from a parking area to the cabin, outlining steps, or defining a deck edge. Look for models with replaceable batteries, weather-resistant construction, and warm light rather than the blue-white glare found in cheaper units. They are not designed to illuminate a large yard, but they make movement after dark feel safer and more intuitive.

    Motion-activated solar lights are better near an entry, wood shed, outdoor storage area, or parking spot. Choose a model with adjustable sensitivity and duration so wildlife does not keep it running all night. Placement matters as much as output. Mount the panel where it receives dependable sun, even if that means positioning the light separately with a connecting cable.

    For evenings outside, a rechargeable lantern often beats fixed lighting. It can move from picnic table to tent to bedside, requires no installation, and gives you useful backup during a power issue. A lantern with dimming controls and a warm-light mode is especially valuable because it can handle both practical chores and a low-key evening on the porch.

    Portable Power Stations Make Lighting More Flexible

    A portable power station can make a small off-grid lighting system feel much less rigid. It can run LED lamps, recharge lanterns and headlamps, and support phone charging or a small fan without requiring a permanent battery installation. Paired with a folding solar panel, it is an accessible option for weekend cabins, camping setups, and people building toward a larger system over time.

    The key is to calculate the loads you actually expect. Lighting is generally a modest demand. For example, four 8-watt LED bulbs used for five hours consume about 160 watt-hours. Add a lantern, a few USB charges, and some reserve capacity, and a compact power station may be more than enough for a short stay.

    Full-time tiny homes and larger cabins may call for a dedicated solar array and battery bank instead. In that case, lighting should be considered alongside refrigeration, water pumps, internet equipment, and other daily loads. Efficient lighting leaves more stored energy for the systems that cannot wait until tomorrow’s sun.

    The Best Off Grid Lighting Solutions by Use Case

    There is no single best setup for every property. The most effective choice follows the scale and rhythm of your space.

    For a tiny home

    Use warm LED ceiling fixtures for general light, focused under-cabinet strips for cooking, and a pair of adjustable reading lights near the bed or seating area. A 12V system is often worth considering if the home is designed around solar from the beginning. Add one rechargeable lantern for backup and outdoor use.

    For a weekend cabin

    Keep the system simple and durable. A few efficient LED lamps, solar path lights near the entrance, and motion lighting at key exterior points can cover most needs. A portable power station gives you flexibility without committing to a major electrical build before you understand how you use the property.

    For a campsite or vehicle-based escape

    Prioritize portability. Rechargeable lanterns, headlamps with red-light modes, magnetic LED bars, and a small solar panel create a lightweight system that adapts to changing conditions. Avoid relying only on headlamps. They are useful for setup and night walks, but shared ambient light makes camp more comfortable and less tiring.

    For a workshop or gear shed

    Put function first. Bright, neutral-white LED task fixtures help with repairs, tool organization, and early-morning preparation. Motion activation can prevent lights from being left on, while a separate warm light near the entrance keeps the space welcoming rather than purely utilitarian.

    Plan for Weather, Maintenance, and Dark Weeks

    Solar lighting is only as reliable as its exposure to sunlight and its ability to store energy. Panels placed beneath tree cover, under eaves, or facing the wrong direction will disappoint no matter how attractive the fixture looks. Before buying, observe where direct sun reaches your property during the seasons you expect to use it.

    Cold temperatures can reduce battery performance, while cloudy stretches can leave small integrated solar lights undercharged. This does not make solar a poor option. It simply means a resilient setup includes backup. Keep a few rechargeable lanterns, a headlamp for each regular guest, and a way to recharge them from your main battery system or power station.

    Maintenance is modest but real. Wipe dust, pollen, and snow from solar panels. Replace rechargeable cells when runtimes noticeably decline. Check seals and mounting hardware before a wet season. These small habits protect the reliability that off-grid living depends on.

    Create Light That Supports the Life You Came For

    The goal is not to recreate a brightly lit suburban house in the woods. It is to create enough light for comfort, safety, and connection while preserving the calm that drew you off the grid in the first place. Use brighter light where work happens, warm pools of light where people gather, and darkness as part of the experience rather than a problem to erase.

    A thoughtful lighting plan gives your space a sense of ease from the first evening onward. Start with efficient LEDs and a dependable power source, then add portable and solar options as your routines become clear. Off The Grid Store believes independence should feel inviting, and the right light is one of the simplest ways to make that freedom visible.

  • Tiny Home Power Planning Guide That Works

    Tiny Home Power Planning Guide That Works

    A beautiful tiny home can still feel frustrating if the power plan is an afterthought. The difference between calm, self-directed living and constant battery anxiety usually comes down to one thing: a smart tiny home power planning guide that starts with your real habits, not a fantasy version of off-grid life.

    For most people, power planning is not about chasing the biggest solar array or the biggest battery bank. It is about building enough capacity for the life you actually want to live. That might mean quiet mornings with coffee and music, a reliable laptop setup for part-time remote work, or a weekend cabin that keeps lights, refrigeration, and water systems running without drama. The right system feels steady and intentional.

    Start your tiny home power planning guide with lifestyle, not gear

    Before you compare batteries, panels, or inverters, define how the home will be used. A full-time tiny home has very different demands than a weekend retreat. A mobile setup also behaves differently than a fixed tiny house on land, especially if roof space is limited or parking conditions change your solar exposure.

    Think in terms of daily rhythms. Do you cook with electricity or propane? Will you run air conditioning in a hot climate, or are you designing around passive cooling and fans? Are you charging tools, cameras, e-bikes, or just phones and a laptop? Every one of those choices shapes the electrical system more than product specs alone.

    This is where many builds get expensive. People often overspend on power because they are trying to cover every possible future scenario. A better approach is to identify your non-negotiables first, then separate comfort upgrades from true essentials. Refrigeration, water pumping, lights, ventilation, and device charging usually sit in the first category. Space heating, electric cooking, and air conditioning can quickly move a system into a much larger budget.

    Calculate your daily energy use honestly

    The most practical part of any tiny home power planning guide is load estimation. That means figuring out how much energy your devices use in a normal day, measured in watt-hours.

    Start with the appliances and systems you will use regularly. A fridge may cycle on and off all day. LED lights might use very little individually, but they still belong in the plan. Water pumps, routers, laptop chargers, fans, composting toilet fans, and vent hoods all add up. If you use a coffee maker, blender, toaster oven, or induction cooktop, those matter too, especially because high-watt appliances affect inverter sizing.

    Be realistic about runtime. A 60-watt laptop charger used for three hours consumes far less than a 1,500-watt induction burner used for even a short period. This is why tiny home electrical planning is often less about how many devices you have and more about which devices create big spikes.

    Once you total your likely daily use, add a buffer. Real life is not perfectly efficient. Batteries lose some energy in conversion, weather can reduce solar production, and people almost always end up charging a few more things than expected. A modest cushion helps the system feel reliable instead of delicate.

    Battery size determines how your home feels

    Battery storage is where comfort and resilience meet. In a tiny home, the battery bank is what gets you through cloudy weather, overnight use, and those days when your routines stretch longer than planned.

    A small battery setup can work beautifully for minimal weekend use. But full-time living usually benefits from more autonomy. If your battery bank is too small, you will think about power all the time. That mental load is the opposite of the lifestyle most people are building toward.

    Lithium batteries are often the preferred choice for modern tiny homes because they offer usable capacity, long cycle life, and less maintenance than older lead-acid systems. They also support a cleaner, more design-conscious setup in compact spaces. The trade-off is higher upfront cost. For many buyers, that higher initial spend makes sense because it improves daily usability and reduces long-term friction.

    A helpful benchmark is to size battery storage around how much energy you want available without sunlight. Some people are comfortable with one day of backup. Others want two or three, especially in shaded locations or winter climates. There is no universal answer here. It depends on your weather, your habits, and how much inconvenience you are willing to tolerate.

    Solar array size is about recovery, not just generation

    People often focus on battery capacity first, but your solar array determines how quickly the system recovers. If the battery is the reserve tank, the panels are the refill strategy.

    A tiny home with limited roof space may not be able to mount enough solar to support an all-electric lifestyle year-round. That is not a failure. It just means the system should be designed around realistic solar harvest, seasonal changes, and backup options.

    Sun exposure matters as much as panel wattage. Trees, panel angle, parking orientation, and winter daylight hours can all reduce output. A home in Arizona and a cabin in the Pacific Northwest need very different expectations, even if they use the same equipment.

    This is why a mixed-energy approach often makes sense. Many tiny homeowners use solar for core electrical needs while relying on propane or wood for heating, hot water, or cooking. That choice is not less committed to off-grid living. It is often the smarter and more efficient path in a compact home.

    Inverter and system design choices matter more than they look

    An inverter converts battery power into the kind of electricity most household appliances use. If it is undersized, key appliances may not run properly. If it is oversized, you may spend more than necessary and introduce inefficiency.

    The right inverter depends on your largest simultaneous loads, not just your daily energy total. A fridge starting up while an induction cooktop and coffee maker are running creates a different demand than lights and device chargers alone. Surge capacity matters here, especially for anything with a motor or compressor.

    You also need to think about system voltage, charging components, and future expansion. A well-planned system leaves room for growth without forcing you to replace major parts too soon. That said, future-proofing has limits. Buying far beyond your current needs can tie up budget that would be better spent on insulation, efficient appliances, or better ventilation, all of which can reduce power demand in the first place.

    Efficiency is the quiet hero of tiny home power planning

    The easiest watt to manage is the one you never have to generate. Efficiency may not feel exciting, but it has a direct impact on how affordable and stress-free your setup becomes.

    Choose appliances designed for compact or off-grid use where possible. Prioritize LED lighting, efficient refrigeration, good insulation, and low-draw ventilation. If you are selecting between two products that serve the same purpose, the lower-energy option can save money across your entire system because it may reduce how much battery and solar capacity you need.

    Heating and cooling deserve special attention. Electric resistance heat can overwhelm a small off-grid system quickly. Air conditioning can do the same in summer. Design decisions like shade, window placement, insulation, ceiling fans, and cross-ventilation are not just comfort upgrades. They are power strategy.

    For buyers building a refined, comfortable off-grid lifestyle, this is often the best place to spend carefully. Better design reduces dependence on oversized gear.

    Build for your version of freedom

    The most successful setups are not the ones with the biggest specs. They are the ones that match the owner’s priorities. If your goal is a quiet weekend reset, your system can stay simple. If you want long-term independence with modern comforts, your plan needs more capacity and more margin.

    A thoughtful tiny home power planning guide helps you avoid two common mistakes: underbuilding and constantly compensating, or overbuilding and paying for complexity you do not need. The right middle ground feels calm. Your lights work. Your essentials stay powered. Your home supports your pace instead of interrupting it.

    That is the real promise of off-grid living when it is done well. Not scarcity. Not survival. Just a home that gives you more control over how you live, when you unplug, and what kind of comfort you choose to keep.